Category Archives: Equipment

Celestron 1100 edge HD – Product review

It’s been a little while since I did an article. I did a move and bought a new telescope. I decided, after much consideration, to purchases the Celestron 1100 edge HD with the CGEM mount. I was pretty hesitant due to the lack of product reviews and in the astrophotography community you can find helpful individuals but you also find some people who think you have an unlimited budget.

I was kinda surprised at the responses when I laid out my budget and said if you could use this much money what would you get? My initial budget was $5,000 USD. I was referenced over to mounts ranging in the $7,000 – $20,000 range. . .not really helpful and the response is “the mount is the most important thing you need to buy.” This is true. But you don’t need the top of the line if you can’t justify the budget. I did just fine with the $700 6SE standard mount and a crappy home made wedge. That being said lets continue. . .

Like I stated there was a lack of product reviews on the product. most likely because of the cost. there as also little in the way of product reviews on the sites that sold said items. . . most likely the same reason. If you want to save a bit of money and you have patience wait till it goes on sale you can save about $500 and I recommend you buy it from a place that has free shipping. So let me put your  mind at ease before you spend about $4,000 on a scope set up.

What should I expect?

Well is this product worth the money you put into it? in my mind yes it was worth every single penny. This thing is a light bucket! but before  get into that I want to start at the beginning. I said to try to find a place that offers free shipping. .is it that big of a deal. Oh yes. I had high expectations but I seriously underestimated what i was getting into. This is what shows up at your house :

It's just a few packages!
It’s just a few packages!

OK so I got a bit of the phone case over the photo eye. . . .

so It doesn’t look like much but I want to tell you that box on the right with the tube. . its bigger than the freezer on my refrigerator in the house we were living in.

When opening this, don’t destroy the tube of the gears boxes. I personally don’t buy the overpriced cases. what I do is I use the box they were shipped in and keep the foam they were shipped in. if it can survive the UPS guys and a long journey from an overseas factory to the Celestron warehouse, to the wholesaler I bought it from to my house. . .the box it came in sounds pretty good to me.

Take your time and be careful when you open it. It’s packaged pretty good, but there are parts and other small boxes inside when opening it.

Assembly

Go slow read the instructions. I double check that all my fittings are tight and everything is secure before letting go.  The scope set up is huge. Unless you are tall, don’t extend the legs fully. I go a little under 1/2 way, this thing gets tall fast!

The instructions are pretty clear an it goes together rather easy. The gearbox is 41 lbs (19 kg).  It is capable of a 40 pound payload.

The tube has handles to help get it mounted properly. There isn’t much to say except go slow, practice in the light and give yourself 20-30 min to get set up. The tube is 28 lbs (13 kg) so you have room for some gear.

assembled it should look like this :

Assembled!
Assembled!


Size is not everything, but I had a great deal of doubt spending more on a scope than I did my car, but you are getting a very solid and substantial piece of equipment. Take this for example, she’s 55 lbs and is average size for Australian Cattle dog :

My dog for comparison.
and in case you need a human for scale. . .

This is with the legs 40% extended. I went lower because trying to use the view finder. . .even at 5’5″ (1.651 meters) I had to use a chair.  I just find it a whole lot easier to just lower it.

 What to expect

I know what you are saying. . “ok, I got it it’s big and heavy.” What you are really concerned with is how does it work.

Let’s start with the mount.  I have been told by many that you need a far better mount. I’m honestly happy with this one. Once in a while I have issues. I keep forgetting to call I think my clutch is not right but I need to check, I also suspect this may have to do with where i balance the weights on the scope. It has only happened twice, but I want to find out how serious it is, both times it happens when trying to photograph Jupiter. The tracking stops and  then it takes off in a direction.  very annoying. . . I tried to shut it down and reset the entire system. I also tried to not use the tracking, but it occurred again. I ended up going to a different target and it worked “ok”

the latitude adjustment

As a tip, When using a wedge you have to think opposite from this. you adjust this to read what your latitude is, not your lat minus the pole. I had it backwards the first night and everything was off!

Aside from this happening it runs super smooth and I have had more excellent tracking than bad. I’m extremely happy with the mount. I’m sure the other mounts out there are excellent, but this one seems to work just fine for now.

the plugs are pretty self explanatory!

Optics. . . it’s a light bucket! What I could never see before I can see just fine. Personally I can’t see things like say the lagoon nebula or the whirlpool with my own eyes, I can with the camera. Faint DSO’s like the great Hercules cluster or the ring nebula or the Saturn Nebula I can see directly by looking at it instead of having to do the averted view. Planets seem far more crisp and detailed i didn’t have to strain to see details. I saw far more moons around Jupiter & Saturn and on Mars you could make out dark patches and the polar caps.

I was surprised though when I took the first set of photographs. I thought it was as simple application, perhaps its and maybe I’m in need of changing things up. I haven’t had a clear night in 2 weeks so I can’t try new processes out. I have a few images I can show as comparisons and I can say the photos are far better.

Now first off my last Saturn photo withe good old 6se:
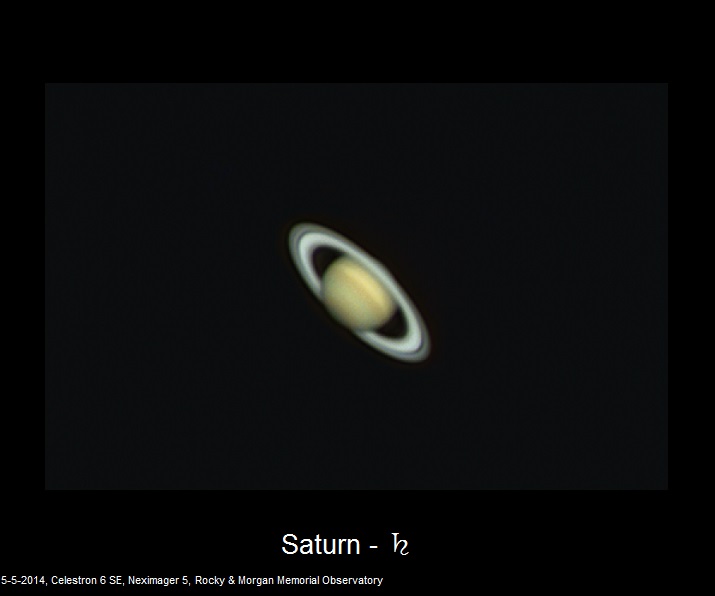
Saturn 5-5-2014
Saturn: using my 6se at a regular zoom

and using a barlow:

Saturn using a 2x barlow 5-5-2014
Saturn: using a barlow & 6se

What you will notice the more you try to zoom in with barlows the less detail you get you get more blotchy and pixelated. Using the exact same process I got the following:

Not perfect, but less pixilation
same here
same here

As you can see the bands are much more pronounced. I was not happy with my results as I know I can do better. I found I have to adapt what I am doing and try to change from the old method to a much better new method.

I tried to use Firecapture but I am not too versed in how it works just yet. I like Icap as well. Please note the newer pictures were taken with a new Skyris 236c camera  instead of the 3 year old neximager5. Once I get it producing much better photos I’ll do a review on it, but between the two cameras. . what I have been able to produce this is far far better. It has a much higher frame rate. . .but back to the scope.

The new method I talk about is this. in the Old I would record for about 1 and a half minutes of Saturn and then run it all through registax6.  Now I record for 2 min and first stack with autostakkert 2. One software I am working on getting the hang of is JUPOS. For DSO’s I broke down and bought nebulosity4. I couldn’t get Deep Sky Staker (DSS) to work properly. It was worth the $100

This is a product review why am I talking processes? Because what used to work on the 6se did not yield very good results on the 100HD. It was very unforgiving for errors. Out of focus, the images make sure you know it when you process them.

another good example of how you can adapt, is I was getting worried about my pictures being complete garbage and that I wasted so much money on a telescope and all along it was just my skills. with learning the new method and better seeing conditions as it went on I got the following results. As a comparison, one of my best mars photos is here from the 6SE :

Dated and titled so we record what I used and when
recent mars with 6se

and

combined the 2 images to try to bring out details in one photo
a darker color to mars

With the 1100 I was able to produce this:

Not too shabby for mars
Not too shabby for mars this is unprocessed

then as I got to applying the new method I got this:

labelled and processed

I think if you compare the two you will see there is no doubt it upped my planetary picture capabilities.

How about Deep space objects?

Good Question. I spent so much time with the planets I had barely much time to hit the DSO’s. Fear not though I got a couple and plan on doing more. The current plan is to get more Saturn and Mars pics while I can then on to Uranus and Neptune into the fall, catch Jupiter next winter/spring. In the interim, between classes and Planets I want to get some practice on the DSO’s

Remember how i said I had to learn a new method on planets? Well While I was doing that I looked into what caused my DSO’s to be so grainy looking and rough. This is called Signal to noise ratio. I had been doing what worked when I should have been looking into the right way. I didn’t know because I avoided certain forums due to egos and bad answers. However in the time I started till now there are some tried and tested methods yielding some really good results and I was just . . .out of the loop. That being said, the 1100 is unforgiving on mistakes remember? So I had to learn a new method.

Old method was I would take a bunch of different exposures to get a good result and then I would take the best of those sets and combine a picture manually in photo shop. That’s where Nebulosity helps out. the way to reduce grainy look is to take multiple photos and longer exposures to reduce signal to noise ratio thus increasing your signal and decreasing the grainy look.  you take about 20 photos of each set then use Nebulosity to combine them into one image, you get a few tools in the program to help edit the photos.

All of that aside how do DSO’s look? here is the ring nebula from the old 6se:

ring nebula: M57
taken on 7-17-2014 with a Celestron 6se

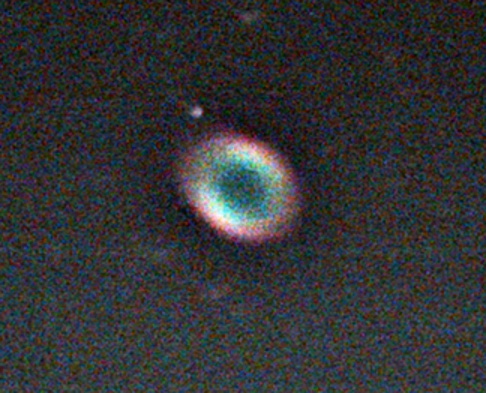
respectable. . but how does the 1100 stack up? Is it worth the money?

I did a half serious attempt to see if the new method was worth investing time and energy into it. this is my result with said “new method”

Ring Nebula
Ring Nebula

While not perfect. it shows the new method combined with the C-1100 has a great amount of potential. A point of note, I used the exact same camera in both of these. as you can also see staking about 10 frames reduced the signal to noise ratio so it is less grainy.  I would love to revisit this, make it look a whole lot better. . .this was a half filled effort to see if it was worth it.

How does it stack up to galaxies? Well with the 6se I never got more than the center of Andromeda. the best I ever got was this image of the cigar galaxy :

SN 2014J in M87 that I photographed in the high deserts of Nevada

now to compare I used the Old method and got this of the whirlpool. After this image it was when I looked into the reducing of the signal to noise ratio. I knew there had to be a way. .

Whirlpool Galaxy eating it's partner
Whirlpool Galaxy eating it’s partner

Now all I need are some clear nights. . it’s been raining for the last 3 weeks.

Negatives

It’s heavy. That being aid once set up it is not mobile. . . not one bit. Polar aligning the mount is kinda dreadful at times. It’s not something I would consider portable.

Set up time is greatly increased.

I find with the EQ mount that it has such mobility I sometimes forget to take cameras out and cables and wires get pulled on. so make sure you take them out. you end up moving around the mount quite a bit. try to plan out the viewing to make moving around it easier. Also due to the size and height. I set the height to a good working height where I can get at the finder scope with out a step stool.

Since set up time is increased. . .so is tear down time. . keep that in mind with bad weather.

It is not a scope for amateurs! It is very unforgiving on errors. So its not a negative, but a word that if you aren’t doing that great on your images at first keep at it.

Movement is awkward. . .only until you get used to it. sometimes you have to go 2 directions just to go upward due to target position in the sky. its frustrating and awkward at first but you soon catch on and tart being able to get around.

One major issue I have is the F/6.3 focal reducer I bought with the 6se doe not work on this scope.  I cannot get the scope to focus using it. Celestron makes one for the 1100 HD the Reducer Lens .7x – EdgeHD 1100. What really angers me is this is another accessory that is another $600 on average. I am seriously angry at this price tag on something like this. I will be looking into a way to make the other one work or adapt it. It came up as an after thought so they developed one, people got the old one to work on this. I will be posting what I find on it. As for now I am limited to the Orion one for my camera.

Final thoughts

Is it worth the price tag? that depends on if you want to seriously dive into the hobby. If you are worried about the price tag, yes it is expensive. You are getting a sold piece of equipment here! nothing about it is flimsy!

Is it a noticeable difference? VERY much! from visual to photography. I still don’t see certain things with my unaided eye so the camera helps me see these. Even the whirlpool I can’t see with out using the camera.

“What about the mount? I have people telling me its not good enough.” Take it with a grain of salt as the saying goes. so many people get really good pictures with the same set up, and others tell you you have to have the latest and greatest. but I can’t justify spending the same amount on a scope set up as I could for a house.

All in all you will definitely see more and deeper. Your planetary images will look far far better.

My next direction I would like to go is getting the HyperStar and a better camera but Hyperstar first.

I sincerely hope this helps. I had 2 years of agony pouring over each minor details between it and a Ritchey–Chrétien. I was very happy with my choice.

As always keep looking up and never let them tell you you can’t do something!

Getting started in Astophotography : is it the right hobby for you?

Are you interested in getting started in astrophotography? How do you know if this is the right hobby for you?  I get asked quite often as I share photos with friends and family members how I do it because they are interested in doing it as well. I have been diligently tracking my progress in a journal and have decided to bring it to this format so as to share what I have seen and what I will see, but where to begin? This would be a great spot to start.

What I suggest is to first find the right equipment. I did an article on this and touched the surface on what kind of telescope to get. There are three ways you can go about this, you can find out what the people that are really into this hobby want to get or have and get the same thing. (I hope you got some deep pockets as the equipment is not cheep.) Buy the cheapest gear out there, or get a starter set up and figure it out from there. Am I trying to deter you from this? not at all, I’m encouraging you to get involved and try it. Look I did this with a budget and so can you. I’ve run into too many elitists in this hobby that try to be the only ones doing something so they try to scare people off, that’s not me. I will say this, the first and foremost thing is you have to be willing to just look some nights, if you are not into astronomy at all, then you are going to get frustrated. Yes this hobby is going to get expensive in some aspects, but trust me, it’s worth it, I’ll help you get into this with a budget and not cut corners on quality.

First things first, I am linking equipment in the articles. I am not a paid advertiser of any vendor. I am only doing it so you can see and read specs on the equipment or possibly find the places to download software or review it yourself.  I do not get paid for my referrals and you clicking it does not get me money or anything what soever.

Telescope:

First and foremost you need a telescope. Personally I bought mine a 6″ Celestron Nextstar 6Se. (I am not advertizing vendors, but linking to where you can purchase items or find them. Celestron uses authorized vendors and this is one I used and have used a few times with success. . . .and honestly has the best prices on Celestron gear) If you are on a budget I recommend this. I’ve had quite a bit of debate with people who say no get the 8″ or the 8SE instead. I’m going to put this out here now so you can chose what you want. If you can afford the 8SE then do it. You will see more and get fainter images. It’s not the magnification or power you want, it’s aperture. However I suggest the 6se if you have never done this or are unsure how committed you are about the hobby. I paid around $800 for the scope, (comes with tripod), the power tank and the case that has the extra eyepieces. for all of it, the 8se is about $1,299 for the same thing. This leaves you enough for a camera if you get into it. While you are learning, if you get good with  some less than epic gear you will be fantastic when you do get the good stuff, not to mention you are going to take some bumps, some lumps and nicks along the road, I treat my gear like I am carrying a holy relic, yet things come apart, things fall and get messed up.  It is also worth noting if you learn on the cheaper step into the art, you know what you will need afterwards.

let me show you some examples of how this pans out.

I did a quick Google search and found this guy's photos
I did a quick Google search and found this guy’s photos all rights retained by Mr. Phillips

Now this is not me making fun of, being critical or anything other than giving you a visual image in which to make a comparison between the optics in a telescope, and why I suggest the 6se as a starter. The vast majority of your results are 1 part telescope, 1 part camera and 4 parts your processing. which I will help people walk through the method I learned.

Saturn
My own I took of Saturn

As you can see this is not a bad image. The difference between this photo and my first ones are a lot of practice, trial and error, hard frustrating moments and nights where I didn’t get anything good.

With this example I am showing you how you can get quality results with the 6se as well as the 8se. But if you are going to come into this hobby and not sure how much you want to spend as well as not sure how dedicated you are going to be, try the 6se. Yes it is difficult to get amazing shots, but this is your entry into the hobby. The thing is, I can get images on par with an 8se with just the 6se and I got into the hobby cheaper, but  can do more with the 8se.

The absolute must on this is you need a motorized mount. one that is an Equatorial mount is ideal, but you can use a regular mount that the 6se comes with aka a fork mount. I’ll explain in a bit

Software:

The cameras all come with capture software.  that’s the good news. the bad is Photoshop is a must. am I saying we Photoshop images to alter their looks? not like the modeling industry does. we use it more of a tool to pull the data that is in the photo out to make it visible. It’s like being able to raise and lower the water level in a lake to see what is where in the lake.

Fortunately, my wife had bought a copy of Photoshop and I can tell you it is worth every single penny paid. There are other programs out there, but I have not been able to get them to work. there are some programs like Gimp, a free alternative to Photoshop, I didn’t know how to work it and once I had Photoshop and learned it I have not tried Gimp. Startools is out there and Maxim DL I have only used startools in the trial version, it gave ok results if it had more tutorials or maybe a trial that was say 30-60 days I would possibly recommend buying it, but the trial was so limited in the free version I can’t say to one way or another. Maxim DL, I hear good things about, but again never tried it. once you have Photoshop, you can do many of the things those programs do, it’s just the programs make it easier for you to do them. Once you learn Photoshop, it’s not that bad. . . I do forget a step now and then and a real problem with this is that it’s after many times of trying that you learn what to apply where and why. That’s what I was looking for when I started and it took a lot of reading to figure it out. Focus magic is one I have heard of but never tried, I have downloaded it, but never tried it. I will though to see if it does any good.

A must have is Registax I should say that this is a must have depending on what camera you choose to use. If you use anything that is a video camera this is what you will need to make a picture out of it. These cameras are the CCD versions. you can go crazy with cameras and buy all kinds. but

why do you need software for cameras? well the reason is this, the CCD is nothing more than a very good webcam. a digital camera recorder,  the programs like Registax and Autostakkert serve the purpose of taking your recorded video and staking the individual frames on top of each other, lined up and it then picks the best pixels out of all the frames creating a nice picture from your video.

Cameras:

There are a few routes to go here and I will only be covering what I have done and why. There are many cameras out there, you can buy the nice cameras from Canon or Nikkon. Canon made the Canon Canon EOS 60Da DSLR Astrophotography Camera, but it will cost you a few pennies. . .about $1,600+ it’s a darn good camera. They happened to have success and realized they were o to something when people used the 20 Ds series and had a bit of luck in using a good camera for astrophotography. They then made the 40Ds, and have since found it is a specialized tool and started with the 60 and jacked the price pretty high. I’m not fond of the cameras and Canon makes a damn good camera, however if I am going to spend that much cash on a camera, I’m personally going to go with a high quality CCD from a company that is specifically making the camera for the purposes of astrophotography. If you where a photographer and have one, great, use it. If not, I would recommend going this route of ccd cams made for the purpose of this hobby, yes you spend a bit of cash, and the camera is good for nothing but this hobby, but out will find more help and support and less frustration using the gear that is designed for the task.

I started with an I-Phone. My wife held the camera up to the eye piece and got a shot. We kept trying and trying this, it was annoying and hard to do. I came up with a way of recording video with a webcam. . .and made a mount. this was not the way to do it. So if you are looking for a way to start, you do not need to do it this way, let me save you tons of frustration.

The camera is the eyepiece, the telescope minus the eyepiece is a zoom lens. that’s it.  You focus using the telescope directly shooting into the camera. Some folks have had a lot of success modifying a webcam and making it work. Let me let you in on a protip here. Don’t bother! The time and effort it takes to get it going as well as the money invested is more than if you just buy a damn camera. Yes  a webcam costs you about $40, then you have to buy a box, another 8, then modify it and deal with the frustration that comes with this  . . . I tried it and am thankful I just bought the camera. The webcam ended up getting ripped out and thrown in the middle of the street one night. . I left it there. The neximage5 is about $160-$200 and worth every penny.

Now what camera do you want to get? I first had a hard time asking this question and getting an answer, the reason, every piece of equipment seems to have a specialty. The neximager5 is great for solar system pictures, but crappy for much else. My Starshoot camera from Orion is great at some long exposure shots, and when I upgrade my system it will be useful for being an autoguider.

Of course we all want to get great pictures of lots of things, but if you had to start off, I would recommend the Neximager first, get your feet wet. The process if far different with the Orion camera. but I use the Neximager for planets, moon and sun. The Orion cam is for long duration shots to get galaxies, nebula and planetary nebula, things you have to leave the shutter open for a lot longer to get. To process these pictures is a whole different process, as in you skip the stacking and use a different process combining images you might have taken. Just know that all equipment is coming up as  pretty specialized to some extent. from what I have found there is no one size fits all for equipment.

One other camera I have is the Orion StarShoot Deep Space Video Camera II. I find this camera does a really good job on bright objects like binary stars or single stars. You can also use it to do alive feed if you so choose.  I have been able to get faint objects, just not as well as the camera designed for long term exposures. The Neximager is not as good for things like stars, but is better at planets than this camera. I find that the quality of color images for binaries and stars is really good and seems to capture color in those objects the best. Again, every piece has a purpose.

Solar equipment:

I have not purchased a solar telescope, I dipped my toes in the solar side by buying a solar filter and getting addicted. I thought “Meh it’s just the sun let me take a look. I probably won’t do it much.” boy was I wrong.

The sun is a star, you can see what happens here and picture it happening on distant suns. of color and size. once you see the bubbling surface, you start to get addicted to granulation.

there are what I see as two companies that make solar telescopes, Coronado and Munt. Personally I am leaning more towards the Lunt. I’ve read great things and shooting for the $1.5-$2k price range. if you are unsure if you want to drop that kind of cash you can get decent shots as well as see things just fine. I bought a solar filter to put over my telescope. In particular I bought a Seymour filter.I chose them over Baader because they were glass filters and not just film. I take the safety of my eyes serious and you should too. I have had some real good views of the sun and enjoy it as much as a night out. I don’t get quite the images that I would be getting with a solar telescope, but I can get good shots of spots and granules. I have not gotten proms, but I am finding it’s all technique and seeing conditions. As with the rest of the hobby, the more you do it the more you get better.

Summary:

Is this list the best equipment out there or is it going to be the best fit for you? no but it works for me and has allowed me to get into the hobby and expand my interests. It has allowed me to get better with what I have and learn. I have been able to figure out the right questions to ask, as I find that is the biggest frustration. . . how do you ask the right questions if you don’t even know what to ask.

But if you are looking to dip your toes in to this realm and see how much you like it, it’s a good way to step in cheap. Not so cheap it sacrifices quality and make you decide to stop, but skipping the errors I did. I hope this helps and leads you down the rabbit hole. I can say that if you are unsure how committed you are going to be, get the 6se, if you are not worried about a $300 price difference by all means get the 8se. But the rest of the gear I suggested should get you rolling.


Solar Observing warnings

Viewing the sun can be rather rewarding, I honestly love it a little more than deep space objects because you can see the detail on the surface of the sun. This can be done safely and is rewarding, however if you fail to follow safety guidelines you will not only damage your equipment, you can lose your eyesight permanently.

Disclaimer : Tips provided here are for informational purposes only.  Please consult the instructions of your specific equipment for its capabilities and safe operation.  SixAlberts is not responsible any damages or injury that may occur.  Failure to follow equipment instructions and safety precautions can and most likely will cause loss of eyesight as well as damage to equipment.

Ok, now for the fun stuff!

Having your eyes roasted out like an ant in a magnifying glass is not on my to-do-list and it shouldn’t be on yours either.

So as a necessity I have to put this warning out there.

Do not ever look directly into the sun with any equipment that is not designed to look at the sun. Make sure all solar filters are checked before you use the equipment. Make sure there are no nicks, tears, cracks, or pinholes in the filter before use.  if using a filter that attaches to the telescope make sure it is snug and in place before turning the scope to the sun.

When observing objects near the sun take precaution to not accidentally look at the sun. When taking things apart, remove the camera and turn the telescope away from the sun before removing the filter. The intense magnification can damage the mirrors and or the lenses.

When using filters note a Hydrogen Alpha filter (ha) is not enough to look at the sun. There are HA solar telescopes use the manufactured telescopes and not just an Ha filter solo. you must use a solar filter in conjunction with a Ha filter.

when allowing others to view, ensure their safety and educate children so they do not make the mistake of thinking they can do this on their own.


Choosing your Equipment: The Telescope, which is right for you?

How to choose the right scope:

When I first decided I wanted to buy a telescope I had the fun of goggling “how to choose the right telescope.”  The sad fact is there is a lot of information out there on this topic, a bit too much. So to help you in the same manor it helps me, I want to explain some things that helps you ask the right questions. I found that I had a bunch of information but no practical knowledge of the matter in which to apply it.

First of what application do you want to use it for? Are you going to take it out as much as possible or just once in a  while? These two questions go hand in hand. The second one, “how often are you going to take it out?” it’s one of those questions  one says yeah I’m going to take it out all the time, then either lose interest from not being able to see anything like they expect in the photos, or set up is a hassle.

What are you going to use it for is the primary question. of course I had no idea I would get into taking photos of space objects, but in my case it works just fine for it.  This goes beyond just, I want to look at things in space or I want to take pictures. Is it something you want to observe the sun? Just want to look at the moon once in a while? Chase a comet when one comes by? See Deep Space Objects (DSO) see distant galaxies or cloudy nebula? The best bit of advice I can give is two fold, 1 don’t cut corners, and 2 Each piece of equipment is specifically designed for a purpose. You can imagine this hobby can get rather expensive rather fast.

Lets not let this deter you. Most people like myself had no idea we would be where we are now with this hobby. It’s like chasing the white rabbit down the rabbit hole. But be honest with yourself and you can get things as you need them, the hobby is modular.

Once you have figured out what you are wanting to look at has been picked you have to figure out what kind of telescope to get.  Again the type of telescope to get is determined more by what you intend on looking at.  Does this mean you can’t look at anything else with it? no. . not at all.

The next part is the size of telescope. First thing people like to say is how big the telescope is or how strong the magnification is.  Let me tell you there is a ton of math out there in this hobby that can make the hobby really dull really fast. . . unless you like math. However Magnification can be calculated by dividing the focal length of your telescope by the focal length of the eyepiece.

My Celestron 6se has a focal length of 1500mm. so depending on what eyepiece I have I generally use a 25 mm as I spot a target and then take that out and attach a camera.  so M = magnification, F = focal length and E = Eyepiece

M= F/E

M= 1500/25

M=60

So with my eyepiece I know I have magnified the image of the moon 60 times.

now the highest useful magnification according to the manufacturer is 354X

so 354 = 1500/E

so the smallest eyepiece I could use is a 4.2ish or a 5 as a 4 would be too strong.

Now, what does this mean?I want to magnify the image as much as possible don’t I? That’s what I thought when buying the 6SE. Fortunately this is not the case at all, and I got lucky that the 6SE was and is a good scope! The aperture of the scope is what is the bucket that captures the light. The wider the aperture, the bigger the bucket to hold water. . . . the more light you can capture, the fainter the object you can see. When you start magnifying the object you lose light but gain magnification. Yes I can use a 6 MM eyepiece, but the object I’m looking at is very dim and hazy.  I honestly see more in a 25 mm than a 6mm (he higher the number the lower the magnification. . .)

The next thing you need to look at stat wise is the F ratio of the scope. The 6se and all the Schmidt-Cassegrain I have seen are f/10. To spare you the details, this is a long dull topic and I’m not here to mash you with any dull details, the thing is this, the lower the f ratio the less time it takes to gather light to take a picture. Can you take photos with a large f/10? yes, I just have to leave the shutter open for longer periods. All this ratio means is how fast is the optics?

What does it all mean? The lower the number the faster. Low F ratios, give you  wider fields of view, brighter images, but lower power. You need to use a low F ratio to get wider angle views.

Higher F ratios means you obviously get smaller field of views (narrower images) higher power, just opposite of the faster  or lower f ratios.

even more confused? This is from  Celestron’s help  article:

“Smaller f-numbers will give brighter photographic images and the option to use shorter exposures. An f/4 system requires only ¼ the exposure time of an f/8 system. Thus, small focal ratio lenses or scopes are called “fast” and larger f/numbers are called “slow.” Fast focal ratios of telescopes are f/3.5 to f/6, medium are f/7 to f/11, and slow are f/12 and longer.

Whether a telescope is used visually or photographically, the brightness of stars (point sources) is a function only of telescope aperture–the larger the aperture, the brighter the images. Extended objects will always appear brighter at lower magnifications. The main advantage of having a fast focal ratio with a visual telescope is that it will deliver a wider field of view than slower f-numbers.”

Reference

Now, you can buy different lenses to help with certain things you need to over come. I bought a focal reducer so I could lower my F ratio. This gives me wider fields of view. . .makes getting shots of the moon for example a little easier or to fit the entire star clusters in. . .some like the double star cluster are rather wide or the dragon fly cluster.

Mounts :

Computerized mounts are the way to go. Don’t even waste your time with anything less. Yes you can swivel them around and aim at things you want to see by finding them on star charts. . . Are you sure that’s what you are looking at? do you want to spend time trying to keep the object in the field of view? the objects are moving and so is the earth. . .

Now depending on how you want to do this is how you choose the kind of mount. . . but wait. . .why not just buy a tube and a mount then put it all together? Yes you can do that, but if you are going to do that you wouldn’t be reading this now would you? After I get done with this you will understand it enough to figure what kind of mount to buy so you can do that with.  .

Celestron Nexstar6se
Stock photo from Celestron. the mount here is the Alt-Az Mount

this is a simple easy to use mount. it turns the scope around, up and down as well. these programmables ones require a power source I have this very scope and mount, it’s been pretty good, except when I put it on a home made wedge, the bottom bolts were too long and I messed up some gearing. It does track pretty decent now, but to do long term exposure I need a wedge in order to get it t work.

What’s this wedge I speak of? It is a way to make the mount the alt-az mount track properly for polar alignment. more on that in a minute

Now what’s the other option?

Oriaon atlas Pro AZ EQ2
EQ mount

This. it’s called an EQ Mount, or an equatorial mount. It’s sole purpose is to be polar aligned so it takes rotation out of the image.  If you intend on doing long term photography which is longer exposures than 30 seconds then you need this.  otherwise the rotation of the earth will twist your images.

But you mentioned a wedge? Yes, a wedge can be used for the alt az this wedge tilts the alt-az mount to align the top of the scope to the axis that we spin on.  this means the earth rotates the same way the mount will pivot on the same axis. The EQ mount just has an axis point that does this for you.

From telescopes.com this shows why you need to polar align


as you can see this is very important if you are going to take photos.  when doing planetary and other photos I never go with out it. Of course you can see the more complicated this gets the more steps in how to align it.

Regardless of what mount you buy, look into the weight limit of the mount. cameras, finder scopes and what not add up weight fast! Personally I am in the phase of buying the scope and mount together.  I know it fits, the software is right and current. . . and I haven’t been let down once yet!

Telescope Models:

now that you know what kind of mount and what the numbers mean, what kind of scope do you choose?

Refractors (a) – Simple. long tube. Cheep, simple construction and little maintenance

Disadvantage : Strength and light gathering is dependent on size and length, not good for viewing faint objects, chromatic aberration

Reflector (b) –  Low cost, portable, and great for faint objects like nebulae, galaxies, and star clusters

Disadvantage : Slight light loss due to secondary mirrors, mirrors sometimes face Collimation issues, Photos are slightly distorted and  diffraction effects: bright objects have spikes caused by the secondary mirror location.

Catadioptrics (c)  Best all purpose Design. designed as a combination of advantages of all designs to that point. Excellent optics, Great for DSO’s and astrophotography, Closed tube design, maintenance free. . .generally. . . Compact and portable Large aperture is priced reasonably, best near focus capability

Disadvantages : More expensive than reflectors of same aperture, Doesn’t look like a telescope (expectations) slight light loss due to the secondary mirror.

telescope mechanics
Watered down version, just an idea of what path the light travels in different designs.

Solar Telescopes

Solar telescopes are designed to look at the sun with. DO not take your telescope to look at the sun unless you read the warnings and know how to look at the sun safely.  Read my page on safe solar viewing and read the warning. However these are designed to give you a great shot at the sun.

You can use solar film and filters, again I will elaborate on this as we go, but for here a solar telescope was designed to look and observe the sun. You will get your best images by buying a solar telescope.

Down side is they aren’t good for much else. I told you that every piece of equipment has a purpose. This is one of those pieces.  I highly recommend solar telescopes over the film or filters. by all means use a film or filter manufactured for this purpose, DO NOT TAKE SHORTCUTS or you will burn your eyeballs out of your head. . .. Seeing the sun was something I thought “meh no big deal let me take a look maybe I’ll look when something cool happens.” . .I view the sun much more often as there is never the same view twice and it is amazing to see the detail you can get on a star this close. . .

I could go into how the things work and all the formulas. . .but odds are you are here to learn something to help you make up your mind and might have no idea what questions to ask. I hope this advice helps!