Tag Archives: astrophotorgaphy for beginers

Venus

Venus captured by Mariner. -Image credit NASA
Venus captured by Mariner.
-Image credit NASA

Venus

When I first moved from the high deserts of Nevada to The tropical warmth of Florida I thought I would never have the ability to get an image of Venus. I was wrong.

Venus is the second planet to the the sun, orbiting at an average distance of 67 million miles (108 million kilometers), Venus is 0.7 astronomical units away from the sun. (1AU is the same as earth’s orbit.)[1] In order to see it you have to look right before sunset and right before sunrise, depending on what time of year it is.  It is usually low in the horizon. Being in Nevada I had little time to catch it,  usually about an hour or 2 before it went too low on the horizon. When I moved to Florida I forgot to take into account how far south I was. I assumed the trees would obscure my view or shorten what was already a short viewing time. Fortunately being this far south moved it up considerably in the horizon!

Before I got into some things I learned on this while trying to observe and photograph, I want to go into the in depth for everyone on the planet itself.

Venus Facts:

First off how big is it? Venus has a radius of 3,760 miles (6,052 kilometers), which is about as big as earth’s but slightly smaller.[1] It is similar in size however its mass is 81.5% of Earth’s.

The most notable and interesting thing about Venus is it’s atmosphere. The atmosphere is 96.5% carbon dioxide, with most of the remaining 3.5% being nitrogen.[2] The thick atmosphere of Venus is one of the best examples of a greenhouse effect. It traps the sun’s heat, and causes Venus to have the highest temperature of all the planets in the solar system. The surface temperature gets higher than 880 degrees Fahrenheit (470 degrees Celsius). While it is the hottest planet the many layers of the atmosphere has layers with different temperatures. About 30 Miles from the surface of the planet the temperature is similar to earth’s.[1] Oddly in stark contrast, at an altitude of about 125 kilometers above the surface, the Venus Express probe has recorded, the temperature drops to a chilly -175°C[3] This atmosphere is so thick that the atmospheric pressure is ninety times that of Earth.

© 2005 Pearson Prentice Hall, Inc

This same atmosphere and heavy clouds are the cause of so much difficulty taking the photographs, which I will cover in a minute. The following two data sets show the difference between first Earth’s atmosphere and then Venus.

synthetic atmosphere absorption spectrum By The author of the workand Hitran on the Web Information System, CC BY-SA 3.0, https://commons.wikimedia.org/w/index.php?curid=20649351
Synthetic Atmosphere Absorption Spectrum. By The author of the work and Hitran on the Web Information System, CC BY-SA 3.0, https://commons.wikimedia.org/w/index.php?curid=20649351

The Surface is pretty barren and rocky, Photographs are difficult to get of the planet’s surface due to the extreme heat. The probes last a short time before overheating and ceasing to function. Here are a few photos of the surface:

The surface of Venus as seen by the Venera 13 spacecraft. Image credit Russian Aviation and Space Agency, now known as the Roscosmos State Corporation
The surface of Venus as seen by the Venera 13 spacecraft.
Image credit Russian Aviation and Space Agency, now known as the Roscosmos State Corporation

The surface of Venus as seen by the Venera 13 spacecraft. The top picture shows the actual color of the surface. This orange tint is due to the cloud cover and how it filters the light to the surface, so this is how it would look if you were standing there.  The bottom photograph shows how the surface would look if it was under earth’s lighting conditions.

A larger view is here:

surface image - Image credit: Russian Aviation and Space Agency, now known as the Roscosmos State Corporation
surface image – Image credit: Russian Aviation and Space Agency, now known as the Roscosmos State Corporation

What does it sound like? The Russians sent the Venra series of probes to the planet and from what I have been able to uncover is that there was a Venra 14 with microphone installed. this is the first probe to record sounds from another plant with in our hearing range. I am linking the audio link here .

The Upper atmospheric winds are pretty strong. The winds have been recorded at about 224 miles (360 kilometers) per hour. Atmospheric lightning bursts light up these quick-moving clouds. Speeds within the clouds decrease with cloud height, and at the surface are estimated to be just a few miles per hour.

The Planet has a weak magnetic field due to it’s slow rotation despite having an iron core. It has no moons and no rings around it. . .[1]

The surface elevation of Venus is shown. The lowest regions are marked in purple, the mid-elevations in green, and the highest parts in yellow. The gray parts are where the mapping by the Magellan spacecraft was incomplete. To see another global view of Venus's topography, click here. Actually, this little movie is pretty good, since the elevation differences between the rolling plains and the continents are more obvious. Image and animation from NASA.
The surface elevation of Venus is shown. The lowest regions are marked in purple, the mid-elevations in green, and the highest parts in yellow. The gray parts are where the mapping by the Magellan spacecraft was incomplete.  Image credit NASA.

Venus Orbits the same direction but the planet rotates opposite of earth. Venus and Uranus rotate the opposite direction of the rest of the planets.[4]

Orbit of venus Image credit: By Lookang many thanks to author of original simulation = Todd K. Timberlake author of Easy Java Simulation = Francisco Esquembre (Own work) [CC BY-SA 3.0 (http://creativecommons.org/licenses/by-sa/3.0)], via Wikimedia Commons
Orbit of venus
Image credit: By Lookang many thanks to author of original simulation = Todd K. Timberlake author of Easy Java Simulation = Francisco Esquembre (Own work) [CC BY-SA 3.0 (http://creativecommons.org/licenses/by-sa/3.0)%5D, via Wikimedia Commons

Phases of Venus

Due to it being closer in orbit to the sun than Earth, we see it in phases much like the moon. Honestly instead of explaining the retrograde and using a whole bunch of math and words one picture on this is easier.

The phases of Venus -created by Rachel Knott using NASA material.
The phases of Venus
-created by Rachel Knott using NASA material.

Photographing Venus

Currently my mount had to go back to Celestron for warranty repair. While trying to take photos of Venus I had the same issue arise as many other nights, hence my slow article output and not many photos this year. Taking photos with it has been a real challenge when it just stops tracking and is not responsive.

I had photographed venus a while back using the 6″ scope, my 6SE, and had the challenge of getting it before it fell to low on the horizon.

Venus taken in Northern Nevada with a Celestron 6se

What I didn’t take into consideration when using the 1100 HD Edge was how much of a light bucket it is. When looking at the moon, for example, it physically hurts to look with out using the moon filter. I attempted to use filters when recording the video to be thrown into Autostakkert2, but this scope pulled in so much light that it washes any detail out. I was left with some nice phases.
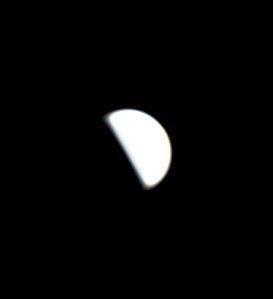
Taken 1-14-2017
Taken 1-14-2017
Taken 1-14-2017
Taken 1-14-2017
Taken 1-14-2017
Taken 1-14-2017
Taken 1-14-2017
Taken 1-14-2017

As you can see the lesson from this is that while the scope aperture being large is nice, it can washout color and leave you with not a whole lot of detail. I took these using the red, blue and light yellow filters to try to get different detail. Honestly, not using any filter was a complete wash out and it was so bad it  was hard to tell where the terminator was on the planet.

The next step I am going to try is to mount the 6se on the mount when it returns and see if I can get the color and cloud detail.  I am going to attempt this between classes and see if I can do anything with the good old 6SE Nextstar mount.  What this lesson should show is that there is not one telescope or one piece of equipment that does everything. As you expand your equipment, don’t get rid of anything unless you have no choice!

As far as equipment, I used the NCelestron C1100 HD Edge, the Celestron 95506 Skyris 236C CMOS camera and the yellow, red and blue filters. Unlike in the 6se, the type of filter did absolutely nothing except show the terminator, I will absolutely revisit this with the 6se.

Speaking of Planetary Filters, What filters should you use? I have a guide here (editorial note:  as of today I have to write this article, which will be next, I just am keeping it as a place holder. )

References;

  1. Venus: In Depth NASA, http://solarsystem.nasa.gov/planets/venus/indepth on line, accessed Febuary 6, 2017.

  2. “Atmosphere of Venus”. The Encyclopedia of Astrobiology, Astronomy, and Spaceflght. Retrieved 29 April 2007.
  3. Mahieux, A. “Densities and temperatures in the Venus mesosphere and lower thermosphere retrieved from SOIR on board Venus Express: Carbon dioxide measurements at the Venus terminator.” Journal of Geophysical Research, vol. 117, E07001, 15pp (2012). doi:10.1029/2012JE004058
  4.  Squyres, Steven W. (2016). “Venus”. Encyclopædia Britannica Online. Retrieved 7 January 2016.
Planets in focus: Mars

Mars

Oh the great red planet, thought for along time to harbor living civilizations that had water canals on it’s surface. As we advanced in knowledge and technology we have landed several times on this planet and observed from orbit. Have we found life? well Not yet. . but that’s not the focus of this topic. I had the opportunity to get photographs as we got closest to the little planet. Why is this significant? Because we orbit faster but not too much faster than the little red planet that could so it takes a while for us to get where we are on the same point on the track as it is as in this diagram I got from Sky and Telescope:

MarsOrbit
Mars and Earth at closest approach. Image credits Sky & Telescope

during these ideal conditions I highly recommend getting out to take a look at least or photographs if possible. It’s like passing a car that’s doing 45 and you are doing 50, it takes a long time for it to catch up and get beside them so it’s going to be a while before we get to do it again.

When we did this recently I was out in full force and got some great pictures. Fortunately my abilities were vastly improved over my old learning curve. I need better gear now! The NexImage 5 Solar System Imager by Celestron is the camera I used and it did a fine job. I was able to get my pictures in the humid Florida skies. For he telescope I used my old trusty Celestron 6SE and did this on a wedge so I could expose the image longer and not have the twisting effect. I also was unguided for these. I proceed the video in Registax 6 and cleaned up the artifacts, hot pixels and bring out the details. When I finish with an image in Registax, it is pretty much finished. Adjusting levels and curves and correcting for color shift or other atmospheric conditions is all that’s really needed on planets.

This is what you can reasonably expect with your 6″ schmidt cassegrain.

Mars 4-9-2014
Mars I took this with a Celestron 6se

As an added bonus when I was taking the photo I got lucky and caught a glint of an object relatively near it:

Mars and Phobos
Mars and Phobos

How did I catch it? I went in to get something to drink and when I got back outside the planet had drifted. As I inspected the image and was trying to remember what direction to turn a faint object had caught my eye. So I left it there and turned up the gain by quite a bit. I had to wash out Mars to get it to even get a good picture. When I get the 11″ I plan on seeing what wonders I can see with y own eyes then!

Planetary Information

I had quite a bit of trouble finding anything concerning the martian soil. So the best thing I can do is refer you to this very detailed report in PDF here. A secondary report is found here. Last one I will link is here.

One very important thing to consider is yes we probably could grow plants on mars to make both oxygen and food. is there enough Nitrogen? here’s a good PDF report on this Here.

There’s more to the problem than just taking plants. Mars has no magnetosphere. For what ever reason it was stripped over 4 billion years ago. This means solar winds can strip the lighter atoms into the atmosphere. It has no shield against solar wind. This would be an issue.


Orbital characteristics
Epoch J2000
Aphelion 249.2 million km

1.6660 AU

Perihelion 206.7 million km

1.3814 AU

Semi-major axis
227,939,100 km

1.523679 AU

Eccentricity 0.0934
Orbital period
686.971 d
1.8808 Julian years

668.5991 sols

Synodic period
779.96 days

2.135 Julian years

Average orbital speed
24.077 km/s
Mean anomaly
19.3564°
Inclination 1.850° to ecliptic
5.65° to Sun’s equator
1.67° to invariable plane
Longitude of ascending node
49.562°
Argument of perihelion
286.537°
Satellites 2
Physical characteristics
Mean radius
3389.5±0.2 km
Equatorial radius
3396.2±0.1 km

0.533 Earths

Polar radius
3,376.2±0.1 km

0.531 Earths

Flattening 0.00589±0.00015
Surface area
144,798,500 km2

0.284 Earths

Volume 1.6318×10¹¹ km3

0.151 Earths

Mass 6.4185×10²³ kg

0.107 Earths

Mean density
3.9335±0.0004 g/cm³
Surface gravity
3.711 m/s²

0.376 g

Moment of inertia factor
0.3662±0.0017
Escape velocity
5.027 km/s
Sidereal rotation period
1.025957 d

24h 37m 22s

Equatorial rotation velocity
868.22 km/h (241.17 m/s)
Axial tilt
25.19°
North pole right ascension
21h 10m 44s

317.68143°

North pole declination
52.88650°
Albedo 0.170 (geometric)

0.25 (Bond)

Surface temp. min mean max
Kelvin 130 K 210 K 308 K
Celsius −143 °C −63 °C 35 °C
Apparent magnitude
+1.6 to −3.0
Angular diameter
3.5–25.1″
Atmosphere
Surface pressure
0.636 (0.4–0.87) kPa
Composition
  • (mole fractions)
  • 95.97% carbon dioxide
  • 1.93% argon
  • 1.89% nitrogen
  • 0.146% oxygen
  • 0.0557% carbon monoxide
  • 210 ppm water vapor
  • 100 ppm nitric oxide
  • 15 ppm molecular hydrogen
  • 2.5 ppm neon
  • 850 ppb HDO
  • 300 ppb krypton
  • 130 ppb formaldehyde
  • 80 ppb xenon
  • 18 ppb hydrogen peroxide
  • 10 ppb methane

Planets in focus: Saturn

Saturn and how to make it look good:

Saturn, what a fitting way to start this out. I haven’t done any planets yet . . .well I had but not on here. The absolute first thing I looked at after getting my scope set up and aligned to the sky was Jupiter.  We saw it sitting there a world floating with nothing holding it but the laws of physics and four tiny dots around it.  .  . the Galilean Goons, in perfect layout in a row. . .all neat and tidy. I could see two large bands one in each hemisphere, I was hooked. So why not write about Jupiter first? I mean if it had been so inspirational then why not write about it first? well there’s quite a story equatable to Moby Dick and Captain Ahab in my chasing of a picture of Jupiter.

So how should this begin? I know I’m not a blogger who is just here to talk about space objects, I’m not an educator in the institutional sense, but I did do many trial and errors with Saturn. For the amateur astrophotographer or just an amateur astronomer, I am certain you will start with this. . .that is if it’s out when you start looking. It is this reason I chose to start with Saturn instead of my first thing, Jupiter. Jupiter had been a bust for me. and not a single photo I tried to take ever worked out. Saturn was at the start of the “crappy era” I was about to throw in the towel,  like many things at the time I thought I would never be able to get it right, the instructions I read where very vague and where summed up like this. . . “slide the bars and try things until it comes out nice. then in photoshop experiment with this and this and BAM you have this Hubble image of Saturn.” No seriously it was like that. I had tried all the little tricks and short cuts to make this cost effective and this is what I came up with.

Saturn 4-20-2013
pretty pathetic. first attempt. I want to show this so you as some one starting out can not feel embarrassed about your photos. . . trust me it gets better!

Oh this sickly photo of Saturn. . .I was trying the old Logitech webcam method. I was brand new, only had it a few weeks and this is what I was trying because I had seen how much the cameras cost and was like wow that’s pricy. So in my looking on the interwebs I found a shortcut. Some people where using Logitech webcams ranging from old models to newer 9000 series. At this point I’m thinking yeah $50 for a camera some time and modifications and BAM an HD webcam I can use to take pictures and yes I do be live I have it. . . .

No let me stop you right there. . . .Just no buy the damn planetary camera. After all the work and making a mount and everything this was the absolute best I could do and that was after trying for hours to get it to line up right. I ended up throwing the camera in the street. I went ahead and tried to find a camera after my wife said I should just stop trying to take short cuts and just get what you need. It was probably one of the best bits of advice I got and can pass on at this point. I started with the Orion StarShoot Deep Space Video Camera II. Now I want to remind you I’m not getting paid for clicks I’m not promoting anything except I would have liked when writers link the object and do the foot work for me when it comes to the items they are talking about. Lets also back it up and remind you that the telescope I am using is a Celestron 6SE. At this point I had not made a wedge for it. The results were instantly noticed!

Saturn May10-2013
Saturn with a good camera. As you can see quality of equipment makes a massive difference. I’m not even good yet

As you can see the camera is now much much better and I finally have photos I’m happy with. but I’ve seen better. Even as I run it through registax, a free downloadable share ware program that takes the video you capture and makes a single image by stacking the best images and pixels on top of each other. .. It’s goign to require a full on article on it in order to get you the best tutorial I can, the kind I wish I had instead of the trial and error I had to deal with.

I’m still not where i need to be. . .the camera I have is very good, it does a lot and has some serious sensitivity. I’ve now invested a chunk of money at almost 1/2 the cost of the scope and now have to use a laptop and Photoshop to get pictures. was I wanting or willing to take it farther? Yes. . .

What more could I do? well as I got into conversations with hobbits and what not I found that there is no all in one camera. No one size fits all kind of solution. I had to go with a planetary camera. what I had was designed for something else. The camera I have there excels at imaging deep space objects but even better at photographing stars. What I needed was a planetary camera. So I figured why not go with what works. I went with the Celestron Neximage 5. A decision I am no mad I made. Of course I got a little better with registax and my ability to get the pictures and process them. The photo processing is most of the battle, but you can’t have a turd and make it into a work of art, you need something that starts out solid to make a work of art.

Saturn 5-5-2014
Saturn: using better equipment and honing my skills this sis what you can reasonably expect in a year.

I even went for a closer look by “zooming in”

Saturn using a 2x barlow 5-5-2014
Saturn: using a 2x Barlow between the telescope and the camera allows you to zoom in.

Using the Barlow let me get a closer look so to speak, but unfortunately I lost some of my focus. the higher the magnification the harder it is to focus. Even still i was able to get the two large divisions in the rings,  the Cassini Division most notably and Encke gap being the farthest outward one. You can also make out the A,B&C rings (working from the outside in) as shown in the following photo

Saturn's ring plane
The rings labeled Image credits : NASA/JPL/Space Science Institute – Cassini-Huygens/NASA http://photojournal.jpl.nasa.gov/catalog/?IDNumber=PIA06536 labelling added by en:User:The Singing Badger (original uploader on the en.wikipedia)

In my photos using nothing more than a laptop, the cheapest entry level camera Celestron offers, Resitax and Photoshop to clean it up, You too can come out with Photos that end up at this point. where do you go from here? well I’d love a bigger scope or maybe a auto guider. These last two were unguided 30 second recordings. I had used a wedge to help take the twisting out.

Saturn Data:

The following is what I have found on it, I’m not going to try to reinvent the wheel the following is directly from wikipedia. . .you can find the same data directly form NASA or any other research site. I can’t make this stuff up but am giving credit to the writers. . .as there isn’t a whole lot of ways I can reword data. ..

Saturn is the sixth planet from the Sun and the second largest planet in the Solar System, after Jupiter. Named after the Roman god of agriculture, its astronomical symbol () represents the god’s sickle. Saturn is a gas giant with an average radius about nine times that of Earth.] While only one-eighth the average density of Earth, with its larger volume Saturn is just over 95 times more massive.

Saturn’s interior is probably composed of a core of iron, nickel and rock (silicon and oxygen compounds), surrounded by a deep layer of metallic hydrogen, an intermediate layer of liquid hydrogen and liquid helium and an outer gaseous layer. The planet exhibits a pale yellow hue due to ammonia crystals in its upper atmosphere. Electrical current within the metallic hydrogen layer is thought to give rise to Saturn’s planetary magnetic field, which is weaker than Earth’s magnetic field but has a magnetic moment 580 times that of the Earth due to Saturn’s larger body radius. Saturn’s magnetic field strength is around one-twentieth the strength of Jupiter’s. The outer atmosphere is generally bland and lacking in contrast, although long-lived features can appear. Wind speeds on Saturn can reach 1,800 km/h (500 m/s), faster than on Jupiter, but not as fast as those on Neptune.

Orbital characteristics
Epoch J2000.0
Aphelion 1513325783 km
(10.11595804 AU)
Perihelion 1353572956 km
(9.04807635 AU)
Semi-major axis
1433449370 km
(9.5820172 AU)
Eccentricity 0.055723219
Orbital period
  • 10759.22 d
  • 29.4571 yr
  • 24491.07 Saturn solar days
Synodic period
378.09 days
Average orbital speed
9.69 km/s
Mean anomaly
320.346750°
Inclination
  • 2.485240° to Ecliptic
  • 5.51° to Sun’s equator
  • 0.93° to invariable plane
Longitude of ascending node
113.642811°
Argument of perihelion
336.013862°
Known satellites 62 with formal designations; innumerable additional moonlets.
Physical characteristics
Mean radius
58232±6 km
Equatorial radius
  • 60268±4 km
  • 9.4492 Earths
Polar radius
  • 54364±10 km
  • 8.5521 Earths
Flattening 0.09796±0.00018
Surface area
  • 4.27×10¹⁰ km2
  • 83.703 Earths
Volume
  • 8.2713×10¹⁴ km3
  • 763.59 Earths
Mass
  • 5.6846×1026 kg
  • 95.152 Earths
Mean density
0.687 g/cm
(less than water)
Surface gravity
  • 10.44 m/s²
  • 1.065 g
Escape velocity
35.5 km/s
Sidereal rotation period
10.57 hours
(10 hr 34 min)
Equatorial rotation velocity
  • 9.87 km/s
  • 35500 km/h
Axial tilt
26.73°
North pole right ascension
  • 2h 42m 21s
  • 40.589°
North pole declination
83.537°
Albedo
  • 0.342 (Bond)
  • 0.47 (geometric)
Surface temp. min mean max
1 bar level 134 K (-139°C)
0.1 bar 84 K
Apparent magnitude
+1.47 to −0.24
Angular diameter
14.5″ to 20.1″
(excludes rings)
Atmosphere
Scale height
59.5 km
Composition
≈ 96% hydrogen (H2)
≈ 3% helium (He)
≈ 0.4% methane (CH4)
≈ 0.01% ammonia (NH3)
≈ 0.01% hydrogen deuteride (HD)
0.0007% ethane (C2H6)
Ices:

  • ammonia (NH3)
  • water (H2O)
  • ammonium hydrosulfide (NH4SH)

Getting started in Astophotography : is it the right hobby for you?

Are you interested in getting started in astrophotography? How do you know if this is the right hobby for you?  I get asked quite often as I share photos with friends and family members how I do it because they are interested in doing it as well. I have been diligently tracking my progress in a journal and have decided to bring it to this format so as to share what I have seen and what I will see, but where to begin? This would be a great spot to start.

What I suggest is to first find the right equipment. I did an article on this and touched the surface on what kind of telescope to get. There are three ways you can go about this, you can find out what the people that are really into this hobby want to get or have and get the same thing. (I hope you got some deep pockets as the equipment is not cheep.) Buy the cheapest gear out there, or get a starter set up and figure it out from there. Am I trying to deter you from this? not at all, I’m encouraging you to get involved and try it. Look I did this with a budget and so can you. I’ve run into too many elitists in this hobby that try to be the only ones doing something so they try to scare people off, that’s not me. I will say this, the first and foremost thing is you have to be willing to just look some nights, if you are not into astronomy at all, then you are going to get frustrated. Yes this hobby is going to get expensive in some aspects, but trust me, it’s worth it, I’ll help you get into this with a budget and not cut corners on quality.

First things first, I am linking equipment in the articles. I am not a paid advertiser of any vendor. I am only doing it so you can see and read specs on the equipment or possibly find the places to download software or review it yourself.  I do not get paid for my referrals and you clicking it does not get me money or anything what soever.

Telescope:

First and foremost you need a telescope. Personally I bought mine a 6″ Celestron Nextstar 6Se. (I am not advertizing vendors, but linking to where you can purchase items or find them. Celestron uses authorized vendors and this is one I used and have used a few times with success. . . .and honestly has the best prices on Celestron gear) If you are on a budget I recommend this. I’ve had quite a bit of debate with people who say no get the 8″ or the 8SE instead. I’m going to put this out here now so you can chose what you want. If you can afford the 8SE then do it. You will see more and get fainter images. It’s not the magnification or power you want, it’s aperture. However I suggest the 6se if you have never done this or are unsure how committed you are about the hobby. I paid around $800 for the scope, (comes with tripod), the power tank and the case that has the extra eyepieces. for all of it, the 8se is about $1,299 for the same thing. This leaves you enough for a camera if you get into it. While you are learning, if you get good with  some less than epic gear you will be fantastic when you do get the good stuff, not to mention you are going to take some bumps, some lumps and nicks along the road, I treat my gear like I am carrying a holy relic, yet things come apart, things fall and get messed up.  It is also worth noting if you learn on the cheaper step into the art, you know what you will need afterwards.

let me show you some examples of how this pans out.

I did a quick Google search and found this guy's photos
I did a quick Google search and found this guy’s photos all rights retained by Mr. Phillips

Now this is not me making fun of, being critical or anything other than giving you a visual image in which to make a comparison between the optics in a telescope, and why I suggest the 6se as a starter. The vast majority of your results are 1 part telescope, 1 part camera and 4 parts your processing. which I will help people walk through the method I learned.

Saturn
My own I took of Saturn

As you can see this is not a bad image. The difference between this photo and my first ones are a lot of practice, trial and error, hard frustrating moments and nights where I didn’t get anything good.

With this example I am showing you how you can get quality results with the 6se as well as the 8se. But if you are going to come into this hobby and not sure how much you want to spend as well as not sure how dedicated you are going to be, try the 6se. Yes it is difficult to get amazing shots, but this is your entry into the hobby. The thing is, I can get images on par with an 8se with just the 6se and I got into the hobby cheaper, but  can do more with the 8se.

The absolute must on this is you need a motorized mount. one that is an Equatorial mount is ideal, but you can use a regular mount that the 6se comes with aka a fork mount. I’ll explain in a bit

Software:

The cameras all come with capture software.  that’s the good news. the bad is Photoshop is a must. am I saying we Photoshop images to alter their looks? not like the modeling industry does. we use it more of a tool to pull the data that is in the photo out to make it visible. It’s like being able to raise and lower the water level in a lake to see what is where in the lake.

Fortunately, my wife had bought a copy of Photoshop and I can tell you it is worth every single penny paid. There are other programs out there, but I have not been able to get them to work. there are some programs like Gimp, a free alternative to Photoshop, I didn’t know how to work it and once I had Photoshop and learned it I have not tried Gimp. Startools is out there and Maxim DL I have only used startools in the trial version, it gave ok results if it had more tutorials or maybe a trial that was say 30-60 days I would possibly recommend buying it, but the trial was so limited in the free version I can’t say to one way or another. Maxim DL, I hear good things about, but again never tried it. once you have Photoshop, you can do many of the things those programs do, it’s just the programs make it easier for you to do them. Once you learn Photoshop, it’s not that bad. . . I do forget a step now and then and a real problem with this is that it’s after many times of trying that you learn what to apply where and why. That’s what I was looking for when I started and it took a lot of reading to figure it out. Focus magic is one I have heard of but never tried, I have downloaded it, but never tried it. I will though to see if it does any good.

A must have is Registax I should say that this is a must have depending on what camera you choose to use. If you use anything that is a video camera this is what you will need to make a picture out of it. These cameras are the CCD versions. you can go crazy with cameras and buy all kinds. but

why do you need software for cameras? well the reason is this, the CCD is nothing more than a very good webcam. a digital camera recorder,  the programs like Registax and Autostakkert serve the purpose of taking your recorded video and staking the individual frames on top of each other, lined up and it then picks the best pixels out of all the frames creating a nice picture from your video.

Cameras:

There are a few routes to go here and I will only be covering what I have done and why. There are many cameras out there, you can buy the nice cameras from Canon or Nikkon. Canon made the Canon Canon EOS 60Da DSLR Astrophotography Camera, but it will cost you a few pennies. . .about $1,600+ it’s a darn good camera. They happened to have success and realized they were o to something when people used the 20 Ds series and had a bit of luck in using a good camera for astrophotography. They then made the 40Ds, and have since found it is a specialized tool and started with the 60 and jacked the price pretty high. I’m not fond of the cameras and Canon makes a damn good camera, however if I am going to spend that much cash on a camera, I’m personally going to go with a high quality CCD from a company that is specifically making the camera for the purposes of astrophotography. If you where a photographer and have one, great, use it. If not, I would recommend going this route of ccd cams made for the purpose of this hobby, yes you spend a bit of cash, and the camera is good for nothing but this hobby, but out will find more help and support and less frustration using the gear that is designed for the task.

I started with an I-Phone. My wife held the camera up to the eye piece and got a shot. We kept trying and trying this, it was annoying and hard to do. I came up with a way of recording video with a webcam. . .and made a mount. this was not the way to do it. So if you are looking for a way to start, you do not need to do it this way, let me save you tons of frustration.

The camera is the eyepiece, the telescope minus the eyepiece is a zoom lens. that’s it.  You focus using the telescope directly shooting into the camera. Some folks have had a lot of success modifying a webcam and making it work. Let me let you in on a protip here. Don’t bother! The time and effort it takes to get it going as well as the money invested is more than if you just buy a damn camera. Yes  a webcam costs you about $40, then you have to buy a box, another 8, then modify it and deal with the frustration that comes with this  . . . I tried it and am thankful I just bought the camera. The webcam ended up getting ripped out and thrown in the middle of the street one night. . I left it there. The neximage5 is about $160-$200 and worth every penny.

Now what camera do you want to get? I first had a hard time asking this question and getting an answer, the reason, every piece of equipment seems to have a specialty. The neximager5 is great for solar system pictures, but crappy for much else. My Starshoot camera from Orion is great at some long exposure shots, and when I upgrade my system it will be useful for being an autoguider.

Of course we all want to get great pictures of lots of things, but if you had to start off, I would recommend the Neximager first, get your feet wet. The process if far different with the Orion camera. but I use the Neximager for planets, moon and sun. The Orion cam is for long duration shots to get galaxies, nebula and planetary nebula, things you have to leave the shutter open for a lot longer to get. To process these pictures is a whole different process, as in you skip the stacking and use a different process combining images you might have taken. Just know that all equipment is coming up as  pretty specialized to some extent. from what I have found there is no one size fits all for equipment.

One other camera I have is the Orion StarShoot Deep Space Video Camera II. I find this camera does a really good job on bright objects like binary stars or single stars. You can also use it to do alive feed if you so choose.  I have been able to get faint objects, just not as well as the camera designed for long term exposures. The Neximager is not as good for things like stars, but is better at planets than this camera. I find that the quality of color images for binaries and stars is really good and seems to capture color in those objects the best. Again, every piece has a purpose.

Solar equipment:

I have not purchased a solar telescope, I dipped my toes in the solar side by buying a solar filter and getting addicted. I thought “Meh it’s just the sun let me take a look. I probably won’t do it much.” boy was I wrong.

The sun is a star, you can see what happens here and picture it happening on distant suns. of color and size. once you see the bubbling surface, you start to get addicted to granulation.

there are what I see as two companies that make solar telescopes, Coronado and Munt. Personally I am leaning more towards the Lunt. I’ve read great things and shooting for the $1.5-$2k price range. if you are unsure if you want to drop that kind of cash you can get decent shots as well as see things just fine. I bought a solar filter to put over my telescope. In particular I bought a Seymour filter.I chose them over Baader because they were glass filters and not just film. I take the safety of my eyes serious and you should too. I have had some real good views of the sun and enjoy it as much as a night out. I don’t get quite the images that I would be getting with a solar telescope, but I can get good shots of spots and granules. I have not gotten proms, but I am finding it’s all technique and seeing conditions. As with the rest of the hobby, the more you do it the more you get better.

Summary:

Is this list the best equipment out there or is it going to be the best fit for you? no but it works for me and has allowed me to get into the hobby and expand my interests. It has allowed me to get better with what I have and learn. I have been able to figure out the right questions to ask, as I find that is the biggest frustration. . . how do you ask the right questions if you don’t even know what to ask.

But if you are looking to dip your toes in to this realm and see how much you like it, it’s a good way to step in cheap. Not so cheap it sacrifices quality and make you decide to stop, but skipping the errors I did. I hope this helps and leads you down the rabbit hole. I can say that if you are unsure how committed you are going to be, get the 6se, if you are not worried about a $300 price difference by all means get the 8se. But the rest of the gear I suggested should get you rolling.